
Mihai Cozma
Verified Expert in Engineering
Mihai在各种技术和工具方面拥有11年以上的专业经验. He is proficient at C/ C++, .NET, and Unity 3D.
Expertise
Previously At

Mihai在各种技术和工具方面拥有11年以上的专业经验. He is proficient at C/ C++, .NET, and Unity 3D.
对于开发者来说,摄像头是游戏开发过程的基石之一. 从只是在国际象棋应用程序中显示你的游戏视图到在3D AAA游戏中熟练地指导镜头运动以获得电影效果, cameras are basically used in any video game ever made, even before actually being called “cameras”.
在本文中,我将解释如何为2D游戏设计摄像系统, 我还将解释如何在最流行的游戏引擎中执行它, Unity.
我们将要共同设计的摄像系统是模块化的,可扩展的. 它有一个由几个组件组成的基本核心,这些组件将确保基本功能, 然后是各种组件/效果,可以选择性地使用, depending on the situation at hand.
我们在这里构建的摄像系统是针对2D平台游戏的, but can easily extended to other types of 2D games, 2.5D games or even 3D games.

我将把相机功能分成两个主要组:相机跟踪和相机效果.
我们将在这里做的大多数摄像机运动将基于跟踪. That is the ability of an object, in this case the camera, 追踪在游戏场景中移动的其他物体. 我们将执行的跟踪类型将解决2d平台游戏中遇到的一些常见场景, 但是它们可以扩展为针对您可能拥有的其他特定场景的新类型跟踪.
我们将实现一些很酷的效果,比如相机抖动, camera zoom, camera fade, and color overlay.
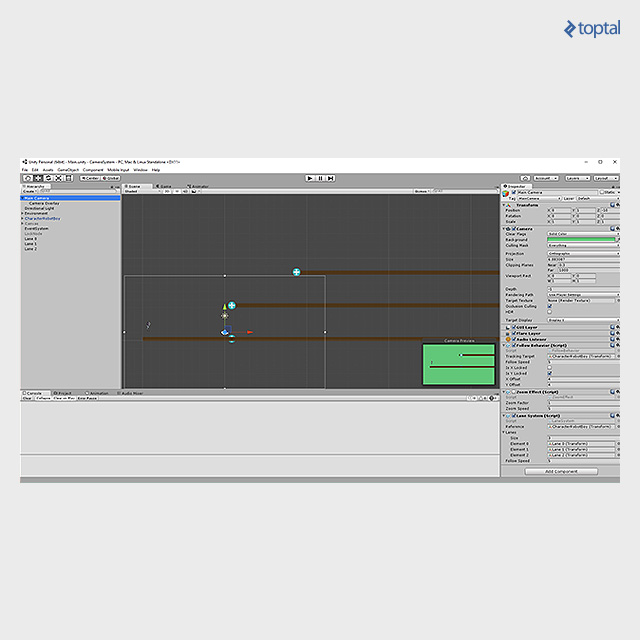
在Unity中创建一个新的2D项目并导入标准资产,特别是RobotBoy角色. Next, create a ground box and add a character instance. 你应该能够在当前场景中与角色一起行走和跳跃. 确保相机设置为正射模式(默认设置为透视).
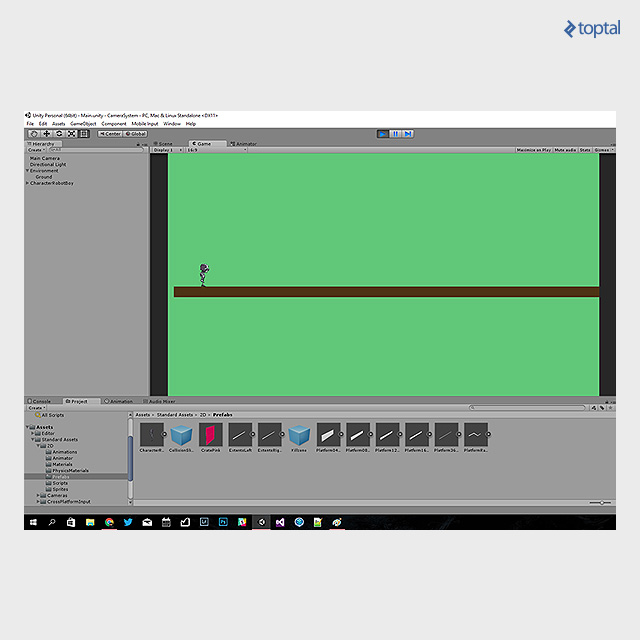
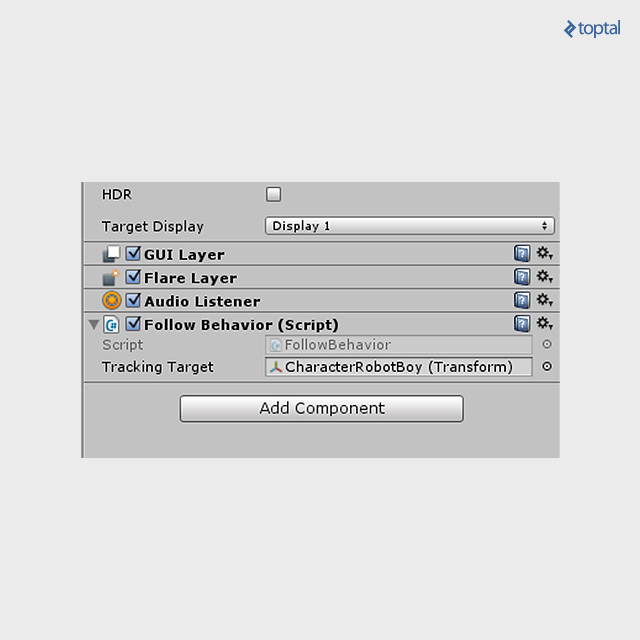
下面的脚本将为我们的主摄像机添加基本的跟踪行为. 脚本必须作为组件附加到场景中的主摄像机,并且它暴露了一个用于分配目标对象以跟踪的字段. 然后脚本确保摄像机的x和y坐标与其跟踪的对象相同. All this processing is done during the Update step.
[SerializeField]
protected Transform trackingTarget;

// ...

void Update()
{
    transform.position = new Vector3(trackingTarget.position.x,
         trackingTarget.position.y, transform.position.z);
}
将RobotBoy角色从你的场景层次中拖到“Tracking Target”字段上,这样就可以对主角进行跟踪.
All good, 但我们可以直接看到一个限制:角色总是在我们的场景的中心. We can see a lot behind the character, which is usually stuff we are not interested in, 我们对我们的角色的未来知之甚少, which might be detrimental to the gameplay.
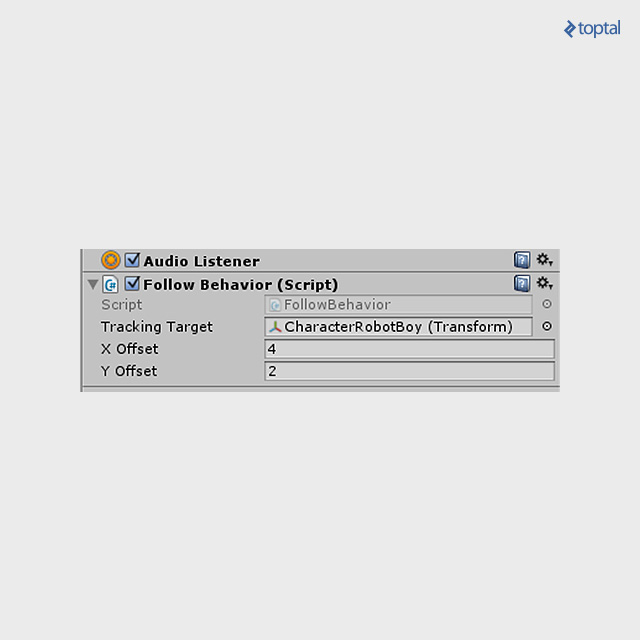
To solve this, 我们正在向脚本中添加一些新的字段,这些字段将允许摄像机在其目标的偏移位置上进行定位.
[SerializeField]
float xOffset;

[SerializeField]
float yOffset;

// ...

void Update()
{
    transform.position = new Vector3(trackingTarget.position.x + xOffset,
        trackingTarget.position.y + yOffset, transform.position.z);
}
下面你可以看到两个新字段的可能配置:
摄像机的移动非常僵硬,也会让一些玩家因为环境的持续移动而感到头晕. 为了解决这个问题,我们将使用线性插值在相机跟踪中添加一些延迟, 还有一个新的领域来控制在角色开始改变位置后相机进入位置的速度.
[SerializeField]
protected float followSpeed;

// ...

protected override void Update()
{
    float xTarget = trackingTarget.position.x + xOffset;
    float yTarget = trackingTarget.position.y + yOffset;

    float xNew = Mathf.Lerp(transform.position.x, xTarget, Time.deltaTime * followSpeed);
    float yNew = Mathf.Lerp(transform.position.y, yTarget, Time.deltaTime * followSpeed);

    transform.position = new Vector3(xNew, yNew, transform.position.z);
}

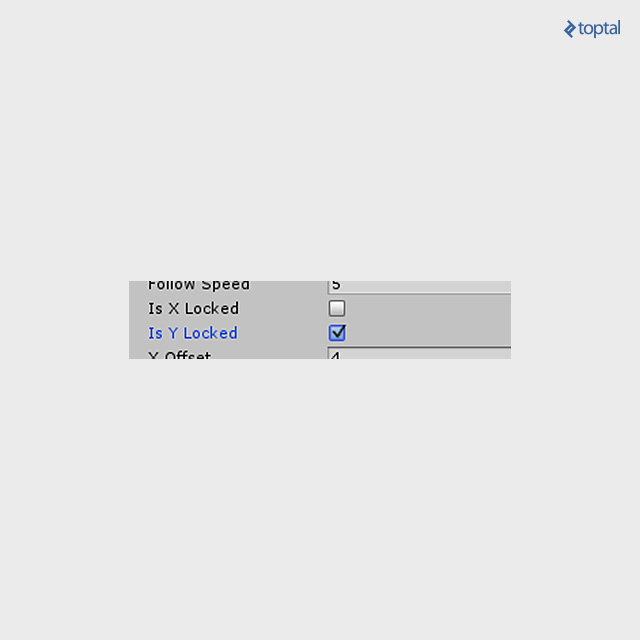
因为你的大脑看着摄像机随着角色一直上下移动是不愉快的, we are introducing axis locking. This means we can limit the tracking to only one axis. 然后我们将我们的跟踪代码分离成独立于轴的跟踪, and we’ll take the new locking flags into account.
[SerializeField]
protected bool isXLocked = false;

[SerializeField]
protected bool isYLocked = false;

// ...

float xNew = transform.position.x;
if (!isXLocked)
{
    xNew = Mathf.Lerp(transform.position.x, xTarget, Time.deltaTime * followSpeed);
}

float yNew = transform.position.y;
if (!isYLocked)
{
     yNew = Mathf.Lerp(transform.position.y, yTarget, Time.deltaTime * followSpeed);
}
现在摄像机只能水平地跟踪玩家,我们被限制在一个屏幕的高度. 如果角色爬上梯子或跳得比这更高,我们就必须跟随. The way we are doing this is by using a lane system.
Imagine the following scenario:

The character is initially on the lower lane. 当角色保持在这条车道的边界内时,摄像机将只在我们可以设置的车道特定高度偏移上水平移动.
As soon as the character enters another lane, 摄像机将过渡到该车道,并继续从那里水平移动,直到下一个变道发生.
为了防止在跳跃等动作中快速切换车道,必须注意车道设计, which can create confusion for the player. 只有当玩家的角色要在一条路线上停留一段时间时,才应该改变它.
lane的关卡可以根据设计师的特定需求在整个游戏关卡中改变, 或者可以完全中断,另一个摄像机跟踪系统可以代替它们. 因此,我们需要一些限制符来指定车道区域.
一个可能的实现是在场景中添加车道作为简单的对象. 我们将在上面的跟踪脚本中使用它们的Y位置坐标与Y偏移量配对来实现系统. 因此,它们在X和Z坐标上的位置并不重要.
Add the LaneSystem class to camera, along with the tracking class, and assign the lane objects to the provided array. 同时将玩家角色分配到参考字段. 当参考点位于一条车道和另一条车道之间时, 两者中较低的一个将用于定位相机.
LaneSystem类负责根据参考位置在车道之间移动摄像机. followSpeed在这里再次用于位置插值, to prevent lane switching from being too abrupt:
[SerializeField]
Transform reference;

[SerializeField]
List lanes;

[SerializeField]
float followSpeed = 5f;

// ...

void Update()
{
	 float targetYCoord = transform.position.y;
	 if (lanes.Count > 1)
	 {
		 int i = 0;
		 for (i = 0; i < lanes.Count - 1; ++i)
		 {
			 if ((reference.position.y > lanes[i].position.y) &&
				 (reference.position.y <= lanes[i + 1].position.y))
			 {
				 targetYCoord = lanes[i].position.y;
				 break;
			 }
		 }

		 if (i == lanes.Count - 1)
			 targetYCoord = lanes[lanes.Count - 1].position.y;
	 }
	 else
	 {
		 targetYCoord = lanes[0].position.y;
	 }
	 float yCoord = Mathf.Lerp(transform.position.y, targetYCoord, Time.deltaTime * followSpeed);
	 transform.position = new Vector3(transform.position.x, yCoord, transform.position.z);
}
这个实现不是WYSIWYG实现,而是留给读者作为练习.
Having the camera move on lanes is great, 但有时我们需要把摄像机锁定在某些东西上, a point of interest (POI) in the game scene.
这可以通过在场景中配置这样的POI并附加一个触发碰撞器来实现. 每当角色进入触发对撞机时,我们便移动摄像机并停留在POI上. 当角色移动并离开POI的触发对撞机时, we get back to another type of tracking, usually the standard follow behavior.
相机跟踪与锁定节点之间的切换可以通过简单的开关或堆栈系统来完成, on which tracking modes are pushed and popped.
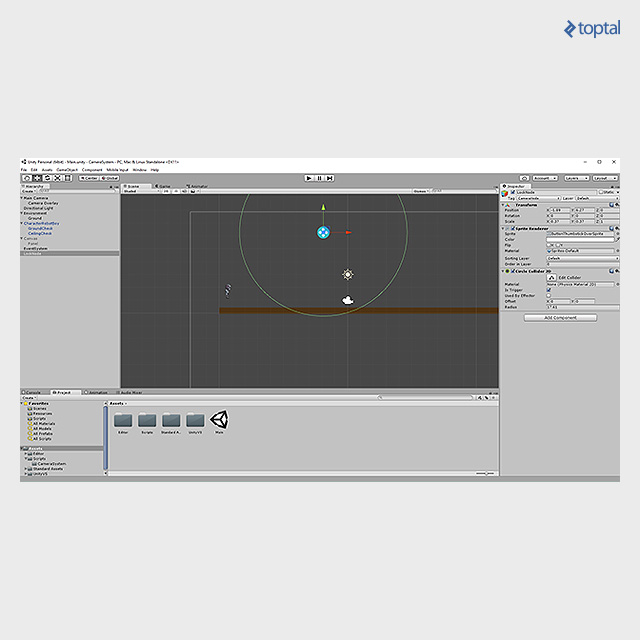
In order to configure a lock node, 只需创建一个对象(可以是空的,或者像下面的截图一样), (精灵),并将一个大的Circle Collider 2D组件附加到其上,这样它就可以标记出当摄像机聚焦节点时玩家所处的区域. 你可以选择任何类型的碰撞器,这里我选择Circle作为例子. 还要创建一个可以轻松检查的标签,如“CameraNode”,并将其分配给该对象.
将以下属性添加到相机的跟踪脚本中:
public Transform TrackingTarget
{
    get
    {
        return trackingTarget;
    }
    set
    {
        trackingTarget = value;
    }
}
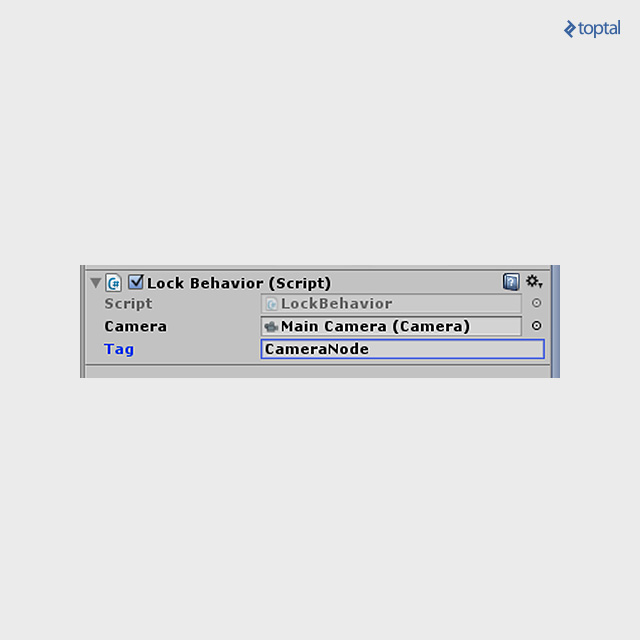
Then attach the following script to the player, 这将允许它暂时将相机的目标切换到您设置的锁定节点. 脚本也会记住它之前的目标,所以当玩家离开触发区域时,它可以回到它. 如果需要的话,你可以在全栈中转换这个, 但出于我们的目的,因为我们不重叠多个锁节点,这就可以了. 另外请注意,你可以调整Circle Collider 2D的位置, 或者再次添加任何其他类型的对撞机来触发相机锁定, this is just a mere example.
public class LockBehavior : MonoBehaviour
{
	#region Public Fields

	[SerializeField]
	Camera camera;

	[SerializeField]
	string tag;

	#endregion

	#region Private

	private Transform previousTarget;

	private TrackingBehavior trackingBehavior;

	private bool isLocked = false;

	#endregion

	// Use this for initialization
	void Start()
	{
		trackingBehavior = camera.GetComponent();
	}

	void OnTriggerEnter2D(Collider2D other)
	{
		if (other.tag == tag && !isLocked)
		{
			isLocked = true;
			PushTarget(other.transform);
		}
	}

	void OnTriggerExit2D(Collider2D other)
	{
		if (other.tag == tag && isLocked)
		{
			isLocked = false;
			PopTarget();
		}
	}

	private void PushTarget(Transform newTarget)
	{
		previousTarget = trackingBehavior.TrackingTarget;
		trackingBehavior.TrackingTarget = newTarget;
	}

	private void PopTarget()
	{
		trackingBehavior.TrackingTarget = previousTarget;
	}

}
相机变焦既可以在用户输入时执行,也可以在我们想要聚焦于POI或关卡内更紧凑的区域时作为动画执行.
Unity 3D中的2D相机变焦可以通过操纵相机的orthographicSize来实现. 将下一个脚本作为组件附加到相机上,并使用SetZoom方法更改缩放系数将产生所需的效果. 1.0 means no zoom, 0.5表示放大两次,2表示缩小两次,以此类推.
[SerializeField]
float zoomFactor = 1.0f;

[SerializeField]
float zoomSpeed = 5.0f;

private float originalSize = 0f;

private Camera thisCamera;

// Use this for initialization
void Start()
{
    thisCamera = GetComponent();
    originalSize = thisCamera.orthographicSize;
}

// Update is called once per frame
void Update()
{
    float targetSize = originalSize * zoomFactor;
    if (targetSize != thisCamera.orthographicSize)
    {
        thisCamera.orthographicSize = Mathf.Lerp(thisCamera.orthographicSize,
targetSize, Time.deltaTime * zoomSpeed);
    }
}

void SetZoom(float zoomFactor)
{
    this.zoomFactor = zoomFactor;
}
Whenever we need to show an earthquake, some explosion or any other effect in our game, a camera shake effect comes in handy.

GitHub上有一个如何做到这一点的示例实现: gist.github.com/ftvs/5822103. The implementation is fairly straightforward. 与我们到目前为止所讨论的其他效果不同,它依赖于一点随机性.
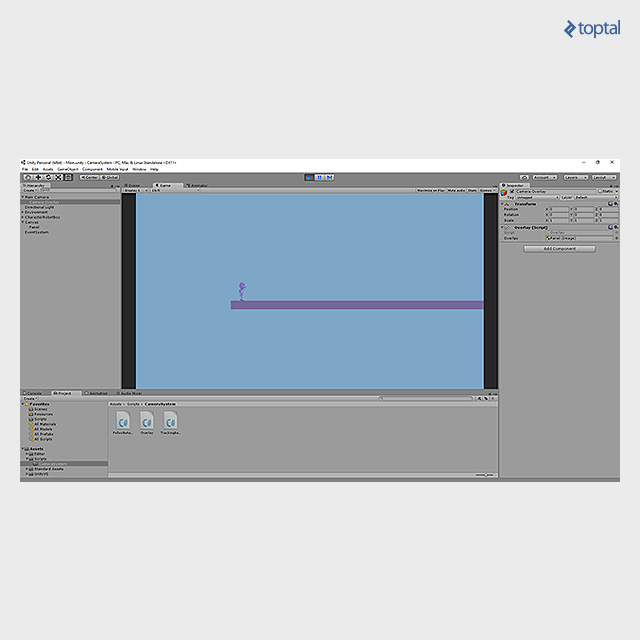
当我们的关卡开始或结束时,淡入或淡出效果非常好. 我们可以通过在整个屏幕上的面板中添加一个不可交互的UI纹理来实现这一点. Initially transparent, we can fill this with any color and opacity, or animate that to achieve the effect we want.
Here is an example of that configuration, 请注意,UI面板对象被分配给主相机对象的“Camera Overlay”子对象. Camera Overlay暴露了一个叫做Overlay的脚本,它的特点如下:
[SerializeField]
Image overlay;

// ...

public void SetOverlayColor(Color color)
{
    overlay.color = color;
}
In order to have a fade-in effect, 通过向目标颜色添加插值来改变你的覆盖脚本,你使用SetOverlayColor设置,就像在下一个脚本中一样, 并设置面板的初始颜色为黑色(或白色),目标颜色为叠加的最终颜色. 您可以将fadspeed更改为适合您需要的任何值,我认为是0.8 is a good one for starters. The value of fadeSpeed works as a time modifier. 1.0表示它将在多个帧中发生,但在1秒的时间框架内. 0.8 means it will actually take 1/0.8 = 1.25 seconds to complete.
public class Overlay : MonoBehaviour
{
    #region Fields

    [SerializeField]
    Image overlay;

    [SerializeField]
    float fadeSpeed = 5f;

    [SerializeField]
    Color targetColor;

    #endregion

    void Update()
    {
        if (overlay.color != targetColor)
        {
            overlay.color = Color.Lerp(overlay.color, targetColor,
                 Time.deltaTime * fadeSpeed);
        }
    }

    #region Public

    public void SetOverlayColor(Color color)
    {
        targetColor = color;
    }

    #endregion
}
在这篇文章中,我将展示为你的游戏设置模块化2D摄像系统所需的基本组件, and also what the required mind set is for designing it. Naturally, all games have their particular needs, 但是有了这里描述的基本跟踪和简单效果,你可以有很长的路要走,也有一个实现你自己的效果的蓝图. 然后你可以更进一步,把所有东西打包成一个可重复使用的Unity 3D包,你也可以转移到其他项目中.
镜头系统在为玩家传达正确的氛围方面非常重要. 当你想到古典戏剧和电影之间的区别时,我喜欢用一个很好的比较. 相机和胶片本身给现场带来了如此多的可能性,它最终发展成为一门独立的艺术, 所以如果你不打算执行另一款“Pong”游戏, advanced cameras should be your tool of choice in any game project you’ll undertake from now on.
Located in Florești, Cluj County, Romania
Member since February 2, 2016
Mihai在各种技术和工具方面拥有11年以上的专业经验. He is proficient at C/ C++, .NET, and Unity 3D.
 作者都是各自领域经过审查的专家,并撰写他们有经验的主题. 我们所有的内容都经过同行评审,并由同一领域的Toptal专家验证.
World-class articles, delivered weekly.
World-class articles, delivered weekly.
Join the Toptal® community.
